

How to Schedule Instagram Posts: Plan and Automate
Yes, you can schedule Instagram posts natively, and the setup takes less than five minutes. Instagram’s built-in scheduler works for feed posts, carousels, and Reels on any Professional (Business or Creator) account. Stories are the one exception: those require Meta Business Suite on desktop. For teams and visual brands, pairing native tools with a platform like Photofy adds the grid previews, approval workflows, and brand controls that Instagram’s scheduler simply does not offer.
The short version:
- Native scheduling is free, supports scheduling posts within a limited advance window and a daily post cap, and requires a Professional account. Private accounts cannot use it.
- Stories cannot be scheduled from the Instagram app. Use Meta Business Suite on desktop instead.
Quickest next steps:
- Switch to a Professional account (Settings > Account > Switch to Professional Account) if you have not already.
- Create a post in the Instagram app, advance to the caption screen, open Advanced settings (iOS) or More options (Android), and toggle Schedule this post.
- For Stories or batch scheduling, open Meta Business Suite on desktop.
Table of Contents
- How do you schedule feed posts and Reels from the Instagram app?
- How does desktop scheduling in Meta Business Suite differ from the mobile app?
- How does Photofy fill the gaps in Instagram’s native scheduler?
- Why is the schedule option missing, and how do you fix it?
- Where do you find, edit, or delete a scheduled post?
- What are the best practices for planning and scheduling Instagram content?
- Key Takeaways
- Why a hybrid workflow is the right call for most teams
- Photofy gives you a smarter way to plan and publish on Instagram
- Useful sources and further reading
How do you schedule feed posts and Reels from the Instagram app?
Instagram’s in-app scheduler is free for all Professional accounts and works directly from your phone. No third-party tool required for basic feed posts and Reels.
- Open the Instagram app and tap the + icon to create a new post or Reel.
- Select your media and apply any edits, filters, or audio.
- Advance to the caption screen where you add your text, tags, and location.
- Tap Advanced settings (iOS) or More options (Android) at the bottom of that screen.
- Toggle Schedule this post to on.
- Pick your date and time, then tap Schedule to confirm.
- Tap Share (or Schedule on some versions) to queue the post.
Your queued posts appear under Scheduled content, accessible from your profile menu (hamburger icon in the top right). On some accounts, the path is Settings > For Professionals > Account type and tools > Scheduled content.
Native limits to keep in mind:
- Maximum look-ahead: 75 days
- Daily cap: 25 posts per account
- Minimum buffer: 30 minutes from the current time
- Stories: not supported in-app
A minimum buffer time between scheduling and publishing is required to avoid scheduling errors. Instagram rejects any time that falls inside that window, which can catch you off guard if you are working close to your intended publish time.
Pro Tip: Plan at least one hour ahead rather than the minimum 30 minutes. That buffer gives you time to catch a caption typo or swap a thumbnail without the scheduler rejecting your post.
How does desktop scheduling in Meta Business Suite differ from the mobile app?
Meta Business Suite on desktop handles everything the mobile app does, plus Stories scheduling and a calendar view that makes batch work much easier. If you manage content for a week or a full campaign at once, the desktop planner is the faster route.
Steps to schedule from Meta Business Suite:
- Go to business.facebook.com and select your Instagram account (connect it to a Facebook Page if you have not already).
- Open Planner from the left navigation.
- Click Create post or Create story and upload your assets.
- Write your caption, add hashtags, and set any tags.
- Click Schedule for later instead of Publish.
- Choose your date and time, then confirm.
How it compares to the mobile app:
- Stories support: Desktop only. The in-app scheduler does not queue Stories at all.
- Calendar/planner view: Meta Business Suite shows your full schedule visually, which is useful for spotting gaps or overlaps across a week or month.
- Batch scheduling: You can create and queue multiple posts in one session without reopening the app each time.
- Facebook Page link: Meta Business Suite requires your Instagram to be connected to a Facebook Page, which adds a setup step but also lets you cross-post to Facebook simultaneously.
- Same core limits apply: The 75-day maximum and 25-post daily cap carry over from the native scheduler.
Pro Tip: Use the Meta Business Suite planner at the start of a seasonal campaign. Mapping out four to six weeks of content in one session prevents the last-minute scramble and keeps your Stories stickers tested before the campaign goes live.
One practical consideration for teams: Meta Business Suite does not have role-based access controls, so anyone who logs in has full publishing rights. That is a credential-sharing risk worth addressing before you scale.

How does Photofy fill the gaps in Instagram’s native scheduler?
Native tools are free and sufficient for single-account workflows, but they leave real gaps for teams: no visual feed preview, no approval workflow, no asset library, and no brand controls. Photofy is built to cover exactly those gaps.
What Photofy adds to your scheduling workflow:
- Drag-and-drop content calendar for visual planning across feed, Reels, and Stories
- Pre-designed templates and asset library so your team creates on-brand content without starting from scratch
- Auto-posting for feed posts and Reels, with Stories support via Meta Business Suite connection
- Brand kit and white-label controls for enterprise clients and franchises that need consistent visuals across multiple accounts
- Team permissions so drafts, reviews, and approvals happen inside the platform, not over email or shared passwords
Setting up Photofy for Instagram scheduling:
- Create your Photofy account (free tier available; paid plans unlock scheduling and team features).
- Connect your Instagram Business or Creator account, and optionally link your Facebook Page for Meta Business Suite cross-posting.
- Build your content calendar using Photofy’s templates and asset library. Drag posts into your preferred publish dates.
- Set posts to auto-publish or export to Meta Business Suite if your workflow requires a manual review step.
The typical team workflow runs: draft → review → approve → schedule. A content creator builds the post using a brand-approved template, a manager reviews it inside Photofy, and once approved, it queues automatically. Analytics within Photofy then let you measure which formats and times drive the most engagement, so you can refine your Instagram content calendar over time.
For enterprise brands and franchises, Photofy’s white-label features let you push approved content to a network of accounts without each location needing to create assets independently. That is a meaningful time saving when you are managing dozens of accounts.

Why is the schedule option missing, and how do you fix it?
Most scheduling failures trace back to one of five causes. Check this list before contacting support.
- Personal account: Native scheduling only works on Professional accounts. Go to Settings > Account > Switch to Professional Account.
- Outdated app: An older Instagram version may not show the schedule toggle. Update the app in the App Store or Google Play.
- Time too close: You picked a time within 30 minutes of now. Choose a time at least an hour out.
- Daily cap reached: You have already queued 25 posts for that day. Remove or reschedule one to free up a slot.
- Too far ahead: Your chosen date is beyond 75 days from today. Move it within that window.
- Facebook Page not connected: Some Meta Business Suite features require your Instagram to be linked to a Facebook Page. Connect them in Meta Business Suite settings.
For shared team accounts, permission errors are a separate issue. If a team member cannot see the schedule option, they may be logged in with a role that lacks publishing rights. The cleaner fix is to use a platform like Photofy, which assigns role-based access so each person only sees what they need. That also eliminates the security risk of sharing account passwords across a team.
Where do you find, edit, or delete a scheduled post?
Both Instagram and Meta Business Suite give you a view of your queued content, and both let you edit or delete before the post goes live.
On Instagram mobile:
- Go to your profile and tap the hamburger menu (three lines, top right).
- Tap Scheduled content.
- Tap any queued item to edit the caption, change the time, or delete it. On some accounts, the path is Settings > For Professionals > Account type and tools > Scheduled content.
On Meta Business Suite desktop:
- Open Planner from the left navigation.
- Locate the scheduled item on the calendar.
- Click the item to open it, then choose Edit, Reschedule, or Delete.
Stories scheduled through Meta Business Suite appear in the same Planner view and follow the same edit/delete process. One thing to note: if you scheduled a post through Photofy using the API connection, changes made inside Instagram or Meta Business Suite may not sync back to Photofy’s calendar automatically. Make edits inside Photofy when possible to keep your content calendar accurate.
What are the best practices for planning and scheduling Instagram content?
Scheduling with intent beats scheduling for volume. A consistent, well-timed post will outperform three rushed ones every time.
- Batch your creation days. Set aside one or two days per week to create all your content. This keeps your voice consistent and prevents the quality dip that comes from creating under deadline pressure.
- Use a brand kit. Consistent fonts, colors, and logo placement build recognition faster than any single viral post. Photofy’s templates and asset library make this easy to maintain across a team.
- Write captions first, then design. Your caption drives the action; the visual earns the stop. Draft captions in a document before you open any design tool.
- Put hashtags in a pinned comment. Placing hashtags in the first comment rather than the caption keeps the caption clean and readable without sacrificing discoverability.
- Schedule a format mix. Alternate between feed posts, Reels, and Stories across your week. Instagram’s algorithm rewards accounts that use multiple formats.
- Lock in your time zone. If your audience is primarily in one region, schedule all posts in that region’s time zone. Mixing time zones in a shared calendar is a common source of missed publish windows.
Pro Tip: Before you publish a batch of feed posts, use Photofy’s grid preview to check how the images look side by side. A single off-brand color or mismatched crop can disrupt a carefully planned aesthetic.
For Stories specifically, schedule them through Meta Business Suite at the start of your campaign week. Test any interactive stickers (polls, questions, countdowns) in a draft before the campaign goes live, since some sticker types have limitations in the desktop scheduler.
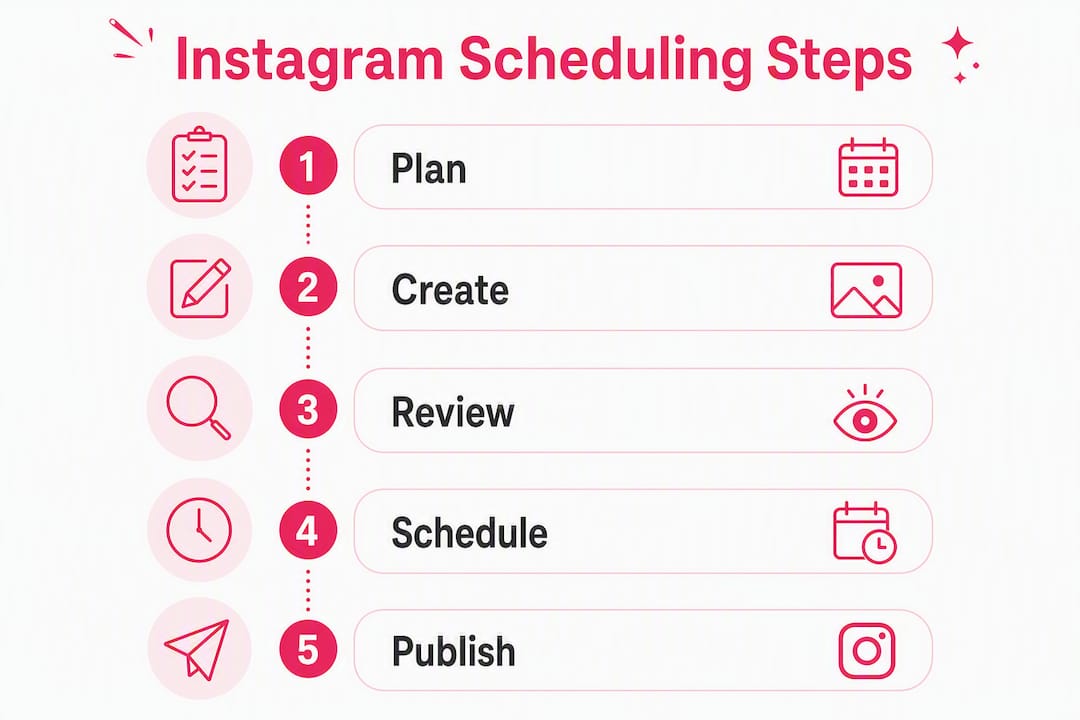
Key Takeaways
Scheduling Instagram posts natively is free for Professional accounts, with hard limits of 75 days ahead and 25 posts per day; Photofy extends that with visual planning, team approvals, and brand controls.
| Point | Details |
|---|---|
| Native scheduling requirements | Only Professional (Business or Creator) accounts can schedule posts natively; private accounts cannot. |
| Core native limits | Schedule up to 75 days ahead, no more than 25 posts per day, with a 30-minute minimum buffer. |
| Stories need desktop | Stories cannot be scheduled from the Instagram app; use Meta Business Suite on desktop instead. |
| When to use a platform | Paid tools like Photofy make sense when you need grid previews, team approvals, or multi-account publishing. |
| Photofy for teams | Photofy adds a visual content calendar, brand kit, templates, and white-label controls to your scheduling workflow. |
Why a hybrid workflow is the right call for most teams
The instinct to go fully native or fully platform-based usually leads to either overpaying or under-delivering. For a solo creator posting three times a week, Instagram’s in-app scheduler plus Meta Business Suite covers everything at no cost. But the moment a second person touches the content, or the brand needs to look the same across more than one account, native tools start showing their limits.
What makes the hybrid approach work is that each tool does what it does best. Instagram’s native scheduler handles the actual publish action reliably. Meta Business Suite adds Stories and a calendar view. Photofy sits above both, handling the creative layer: templates, brand consistency, approvals, and the visual planning that keeps a feed looking intentional rather than assembled post by post.
For franchises and enterprise brands, that creative layer is not optional. Pushing approved, on-brand content to a network of accounts without Photofy’s white-label controls means either a full-time coordinator or a feed full of inconsistencies. The platform pays for itself quickly at that scale.
The one thing most guides understate is the approval workflow. Scheduling a post is easy. Getting the right people to review it before it goes live, without sharing passwords or chasing approvals over text, is where most small teams lose time. That is the problem Photofy solves most directly, and it is worth factoring into your tool decision before you hit that friction point.
Photofy gives you a smarter way to plan and publish on Instagram
Consistent, on-brand Instagram content is the result of a repeatable system, not extra effort. Photofy gives you that system: a visual content calendar, a library of pre-designed templates, auto-posting for feed posts and Reels, and team controls that keep everyone working from the same approved assets.
For small businesses, the free tier covers personal use. For teams and growing brands, paid plans add scheduling, analytics, and the approval workflows that keep content quality high without slowing your team down. Enterprise and franchise clients get white-label controls and multi-account publishing built in.
- Save time: Build a week of content in one session using templates and a drag-and-drop calendar.
- Stay on brand: Every post your team publishes draws from the same approved asset library and brand kit.
See which plan fits your workflow at Photofy pricing, or explore Instagram-specific features to get started today.
Useful sources and further reading
- How to schedule Instagram posts (2026 guide) — Practical walkthrough of native scheduling limits including the 75-day window and 30-minute buffer rule.
- How to schedule posts on Instagram (August 2026) — Covers mobile and desktop scheduling flows, Stories limitations, and when third-party tools add value.
- Social Media Scheduling for Marketers: Pick the Right Tool — Photofy’s guide to choosing between native and platform-based scheduling for different team sizes and use cases.
- Photofy content calendars — Overview of Photofy’s calendar features for planning and batch-scheduling Instagram content.
- Photofy pricing — Free tier, paid subscription tiers, and enterprise plan details for teams evaluating scheduling and brand management features.